Sidekiq Rundown Part 1: Getting Started with Simple Workflows
What is Sidekiq?
At Custom Ink we leverage Sidekiq as a job scheduler to execute batch processing workflows. This post is part of a series, "Sidekiq Rundown," where we will explore various features of Sidekiq. Sidekiq enables us to efficiently parallelize jobs/tasks reliably and sidekiq queues allow the workloads to stack up. The main point of utilizing a job scheduler is to manage the background execution of jobs that orchestrate business activity automation. Using an open-source technology solution like Sidekiq allows us to skip all the headaches involved in building a full-featured in house solution. We will dive right into the steps required to execute work within sidekiq.
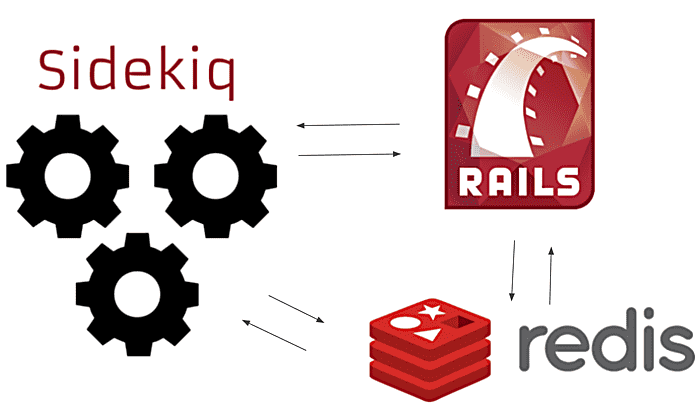
Sidekiq Architecture

Sidekiq runs on 3 components
- The Rails Application
- Sidekiq worker process(es)
- Redis
Each of these components can be scaled up to meet the needs of your workflows.
Sidekiq Configuration
The rails application requires the sidekiq gem to be installed and configured.
In Gemfile
gem 'sidekiq'
In Terminal
bundle install
The sidekiq code that lives in the application will need to be configured to talk to Redis.
Inside of config/initializers/sidekiq.rb
# Server config
Sidekiq.configure_server do |config|
  config.redis = { namespace: 'blog-post-app' }
end

# Client config
Sidekiq.configure_client do |config|
  config.redis = { namespace: 'blog-post-app' }
end
Sidekiq Workers
Code that is executed lives within the rails application in the form of workers. Each worker is required to have a 'perform' method as the entry point. These workers ideally will behave in an idempotent manner, meaning no matter how many times they run, the result will be the same.
Create a worker in app/workers with
rails g sidekiq:worker BlogPost
class BlogPostWorker
  include Sidekiq::Worker
  def perform(subject, title, article)
    # writes a blog post
  end
end
Now that we have created a worker, we can create jobs with that worker. Open up a rails console within your application and create some jobs.
BlogPostWorker.perform_async('Sidekiq', 'Sidekiq Rundown', 'At Custom Ink we leverage...')
Sidekiq Worker Process
This will enqueue a job into the default queue to be processed by sidekiq. Now it is time to start sidekiq
bundle exec sidekiq
Sidekiq will crawl the application for any Sidekiq::Worker classes and initialize the source code of each method within the class inside of the sidekiq process. This is key because it allows the code to be executed asynchronously over several worker processes in parallel. After the sidekiq worker process starts up it will start polling its respective queues looking for jobs.
Pro Tip: Whenever you change code inside your workers, it is always safest to restart your sidekiq worker process so that Sidekiq has the latest version of your worker code.
Sidekiq Queues
If we wanted to create a high priority queue, we can achieve this by simply configuring workers to queue jobs into a new queue.
class BlogPostWorker
  include Sidekiq::Worker
  sidekiq_options queue: :critical
  def perform(subject, title, article)
    # writes a blog post
  end
end
We can tell the sidekiq worker process about this queue when we start the process. We can also can give the critical queue a weight of 5.
bundle exec sidekiq -q critical,5 -q default
Above we have told the sidekiq process that we want this worker process to poll the critical queue 5 times more often than the default queue.
In this post, we have gone over how to configure your rails application and write some worker code that executes when a sidekiq worker process can pull a new job from a queue. Congratulations, you now know how to do simple background processing with sidekiq. Background jobs are very useful when you need compute cycles done behind the scenes without affecting the user experience.
Next post we will take a look at how to optimize your sidekiq architecture for maximum parallelism. We will introduce batching and handling the completion of your jobs.
Thank you for visiting the Custom Ink Tech Blog and taking a moment to read my first post. Please feel free to comment and ask questions below.
Sidekiq Resources
About the author
Logan Beougher is a Software Engineer at Custom Ink and has been an Inker since May 2019.
Interested in writing really fast code? We’re hiring! Visit us at customink.com/jobs