Dynamic SVGs Using <defs> Elements & JavaScript
The scalable vector graphics format has a really nifty way to define and reuse objects. It does this by allowing objects or paths to be defined in the <defs> element and then used one or many times with the <use> element. It is a great way to keep your SVG's file size low. Even better, it makes for a great programmatic interface to dynamically compose an image.
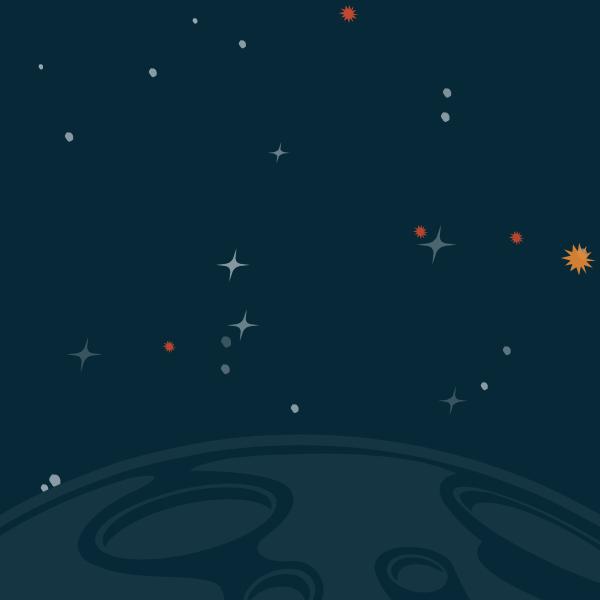
While designing the third iteration of my personal MetaSkills.net blog, I decided to carry the retro space theme into the background of the fixed left navigation area. The design called for something like this image below. Besides the planet, it has three distinct types of stars that are scattered all over the place. Each has a different scale and opacity with plans to animate a few.

So where to start? We could export a final pre-designed SVG image from any type of vector program – but that would bloat the file size since it would copy and paste each star's path. It would also make animating distinct stars tricky and require post production edits. Lastly, who has time to randomly scatter stars? Not me! So let's program up a solution that solves all of this for us. Here is the base SVG structure that we are going to work with.
<svg
  version="1.1"
  width="300px" height="700px"
  viewBox="0 0 300 700"
  preserveAspectRatio="xMidYMax slice"
  xmlns="http://www.w3.org/2000/svg"
  xmlns:xlink="http://www.w3.org/1999/xlink">
  <defs>
    <!-- Define star objects here. -->
  </defs>
  <style type="text/css">
    .star    { fill: #95a8b1; }
    .burst   { fill: #e4522a; }
    .steeler { fill: #fffbe1; }
  </style>
  <rect x="0" y="0" width="100%" height="100%" fill="#052838" />
  <g id="starfield">
    <!-- Use stars objects here. -->
  </g>
  <script type="text/ecmascript">
    <!-- Dynamically create stars here. -->
  </script>
</svg>
Our image will have a slender vertical portrait area to match the general proportions of the sidebar. The SVG is setup to preserve the aspect ratio in such a way that allows the bottom planet to always be in view when scaled. We have a <defs> area where we can add reusable objects, an in-line style sheet for our awesome CSS, and a <g> starfield element to hold each star. Lastly, a place to write some JavaScript.
Base Star Objects
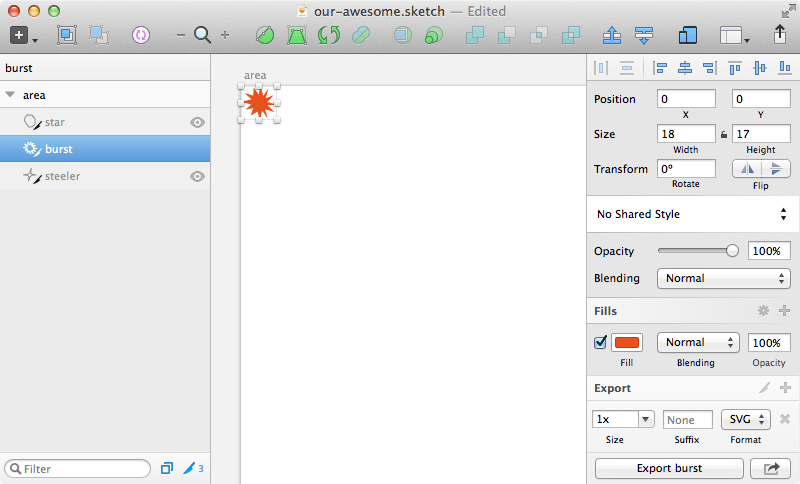
Adding these to our SVG is really easy. I started by creating a canvas in my favorite vector program, Sketch. We want to make sure our exported paths start at 0,0 position and are are generally the size you expect to use them. This will help you later when translating these paths to different positions.

I exported each star type as an SVG and then copied the path into the <defs> area of our template above. When you do this make sure that each path has its own unique id. Also, you may want to optimize your paths. Many programs export 6 or more decimal points for a path's data. I recommend running them through some sort of SVG optimiser or tweaking your export settings if your art program has them. Now we have our reusable path objects, see below. Examples have truncated d attributes for brevity.
<defs>
  <path id="star" d="M2.395,0.409 C2.026,0.973 ... Z"></path>
  <path id="burst" d="M6.092,4.816 L1.661,3.4 ... Z"></path>
  <path id="steeler" d="M3.231,6.211 L0,5.830 ... Z"></path>
</defs>
Using Defined Objects
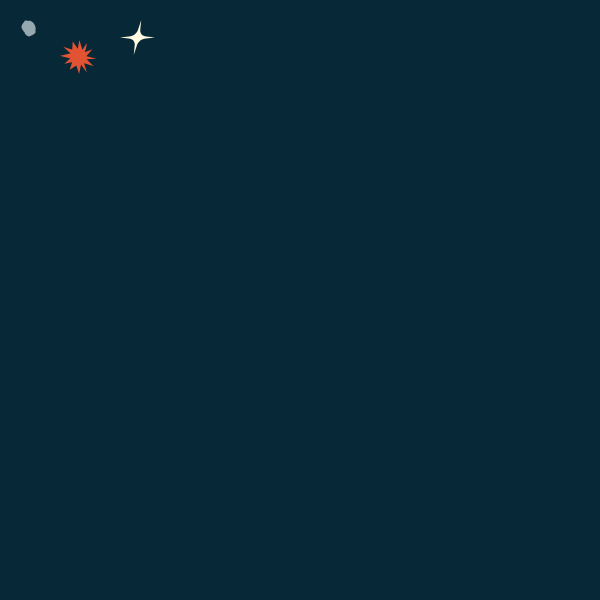
If we were to view our SVG now, it would be pretty boring and contain only the colored background rect. So lets add some stars by using the defined objects above. We do this with the <use> element by setting each xlink:href to the id of that object we want to target. To move and size each star, we use the SVG transform attribute to both translate and scale each star. Adding these elements right before the JavaScript tag will create the following image.
<use xlink:href="#star" transform="translate(10,10) scale(1.0)" class="star" />
<use xlink:href="#burst" transform="translate(30,20) scale(1.0)" class="burst" />
<use xlink:href="#steeler" transform="translate(60,10) scale(1.5)" class="steeler" />

Still kind of boring... and who has time to stochastically place several dozen stars around the canvas? Time for some JavaScript automation.
SVGs & JavaScript
Yes! SVGs are distinct documents that can have their own CSS and JavaScript. But in order for this JavaScript to execute, we must embed it into the parent HTML document. Linking to an SVG via an <img> tag will not allow this due to security concerns. We can get around that issue by using an <object> tag instead.
<object data="our-awesome.svg" type="image/svg+xml"></object>
Now that our SVG's JavaScript will execute, how do we go about adding <use> elements to our SVG's document? Fortunately the techniques are very similar to how you would do this with vanilla JavaScript and the HTML DOM. The minor difference is that we have to use two namespaces. One for creating elements and the second for adding the xlink attribute. I recommend we start our JavaScript off with these namespaces as vars. We also want to create variables for our canvas width and height. Finally, we want a handle to our starfield group element.
var xmlns = "http://www.w3.org/2000/svg",
    xlinkns = "http://www.w3.org/1999/xlink";
var width  = 300,
    height = 700;
var starfield = document.getElementById("starfield");
Random JavaScript Helpers
Before we just start adding some stars, we need some random functions to help us position and scale our stars. I like to start low level and build up. So here is our random function that takes a min and max value.
function randomBase(min, max) {
  return Math.random() * (max - min) + min;
}

> randomBase(0,300)   // 229.5510318595916
> randomBase(-50,300) // -22.134714818093926
Building on that, we want to made a random position function to help place each star in our field. This helper only needs the max argument which will be either our width or height. Notice too how it blankets our canvas area by setting the minimal and maximum to -50 and +50. This will ensure each star could be placed slightly off canvas and keeping them from appearing clustered toward the middle. We also floor the return value, no decimals are needed for position.
function randomPos(max) {
  return Math.floor(randomBase(-50, max+50));
}
Here is our random scale function which takes a min and max threshold. This will allow us to adjust the weight of each star type in the cluster and possibly adjust the exported size differences from our image program into the <defs> area. This function returns a two decimal float value.
function randomScale(min, max) {
  return parseFloat(randomBase(min, max).toFixed(2));
}

> randomScale(0.5, 0.9) // 0.6
> randomScale(0.5, 0.9) // 0.85
Finally, here is a helper function that builds on top of randomScale. It takes a star name and returns the proper value.
function randomScaleNamed(name) {
  var scale;
  switch(name) {
  case 'star': scale = randomScale(0.3, 0.8); break;
  case 'burst': scale = randomScale(0.4, 0.9); break;
  case 'steeler': scale = randomScale(1.1, 2.0); break;
  default: scale = 1.0; }
  return scale;
}
Adding Use Elements
Now that we have the boring random functions out of the way, time to create our star-agnostic addElement function. This will create a new <g> element for each star's <use> element. The group is for placement and size, the use is for twinkle and shine animations.
function addElement(name) {
  var g   = document.createElementNS(xmlns, "g"),
      use = document.createElementNS(xmlns, "use"),
      t   = 'translate(' + randomPos(width) + ',' + randomPos(height) + ') ' +
            'scale(' + randomScaleNamed(name) + ')';
  use.setAttributeNS(null, "class", name);
  use.setAttributeNS(xlinkns, "xlink:href", "#" + name);
  g.setAttributeNS(null, "transform", t);
  g.appendChild(use);
  starfield.appendChild(g);
}
This function ends by placing the newly created element within the starfield. For example, calling addElement('burst') once would create this.
<g id="starfield">
 <g transform="translate(58,151) scale(0.9)">
   <use xlink:href="#burst" class="burst" />
 </g>
</g>
To add a bunch of stars!
function addElements(name, count) {
  while (count -= 1) { addElement(name); }
}

addElements('steeler', 15);
addElements('burst', 15);
addElements('star', 50);
Going Further
Thanks for reading this far! If you are interested in how I handled star animations using Bourbon & Sass, check out this gist on GitHub for my source code. It also shows how I animated the planet to spin at the bottom of the image and cover the background stars.
I hope you have as much fun as I have with animating SVGs using JavaScript and Sass! See a full working example on my blog
